 since 1995
Mountain Hunting Gear
MOUNTAIN HUNT
LAYERING
SYSTEM
How to Stay Warm, Mobile, and Ready in the Backcountry
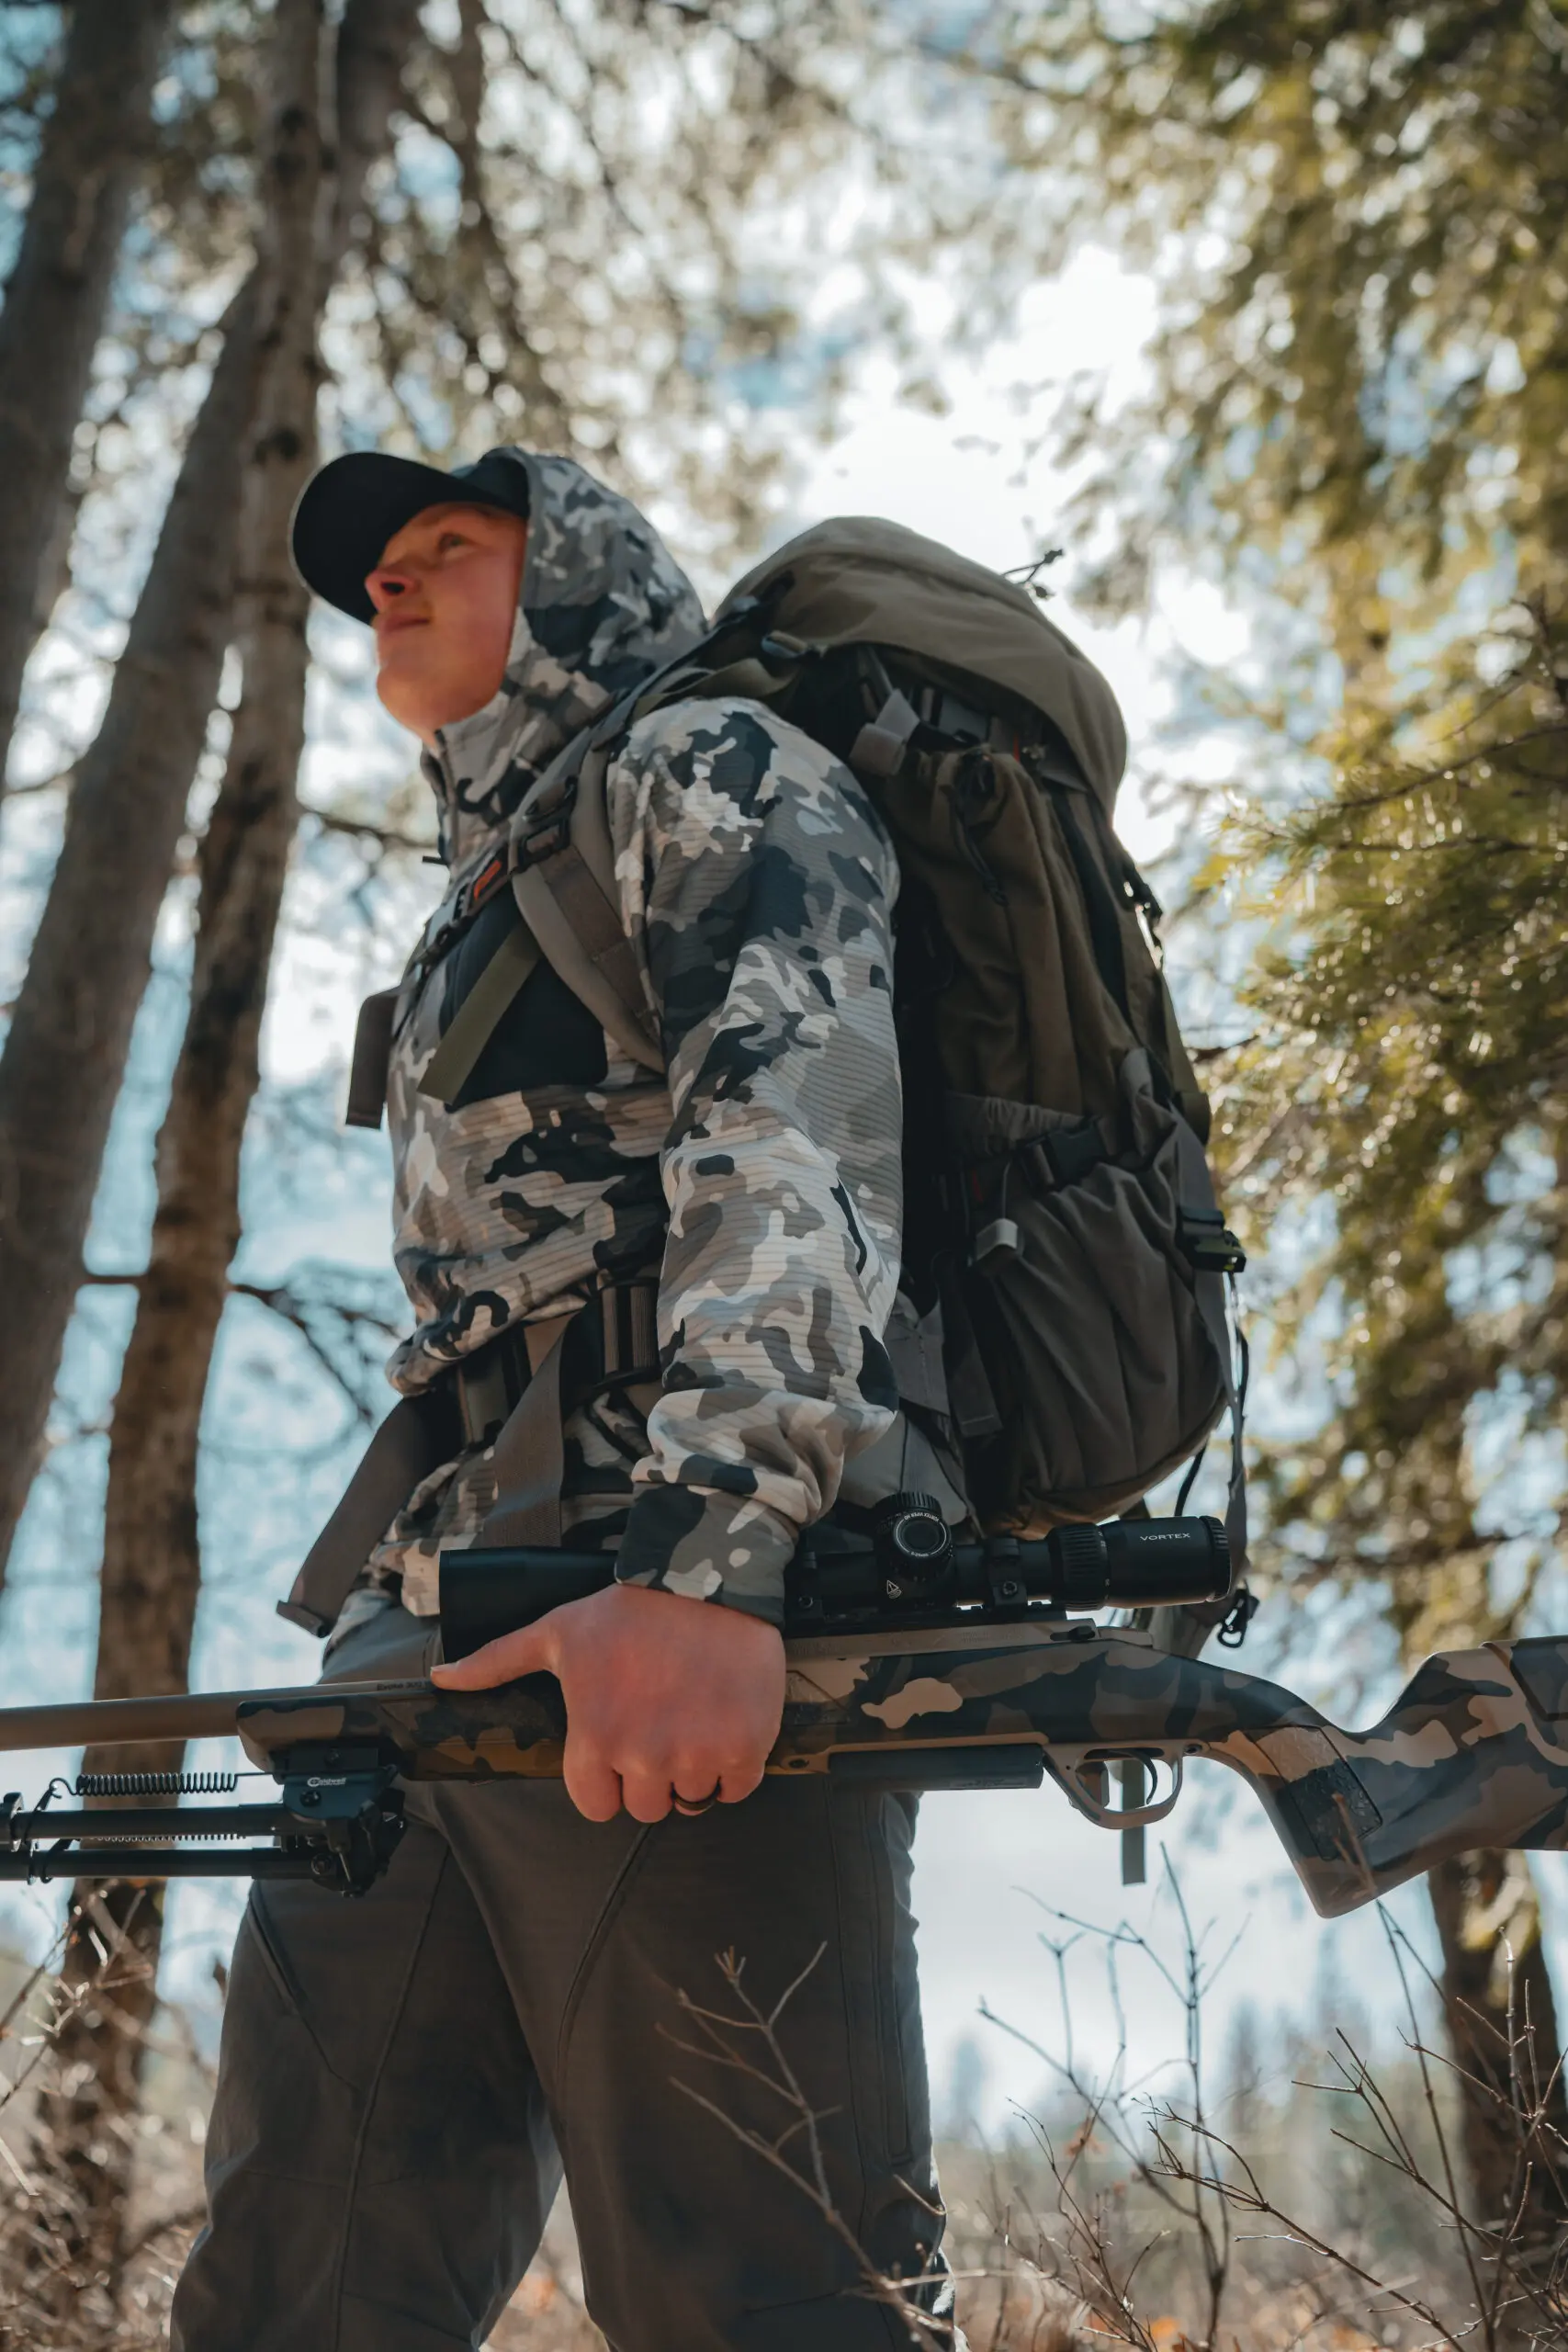
A mountain hunt layering system is one of the few things fully within your control when the forecast changes, the climb gets steep, and the glassing knob turns cold. The mountain does not care what the weather app said before you left camp.
The right system is not about stuffing your pack with every piece of gear you own. It is about building a deliberate kit that manages moisture, regulates temperature, and keeps you mobile when the moment counts.
Why Layering Matters More in the Mountains
Mountain terrain creates its own weather. Temperatures can swing 30 degrees between first light and midday. Climbing a steep basin generates serious body heat, but the moment you stop to glass, you start cooling down fast.
A good layering system solves this by breaking insulation and moisture management across three distinct layers, each with a specific job. When they work together, you stay warm enough to function, dry enough to stay warm, and mobile enough to close the distance when it counts.
The goal is not to be warm at the trailhead. The goal is to stay dry, mobile, and ready through every phase of the hunt.
Layer 1: Base Layer Moisture Management
The base layer sits against your skin, and its job is simple: move moisture away from your body. Sweat is your enemy in the backcountry. Once a base layer gets saturated and stays wet, your ability to regulate body temperature starts to fail.
What to look for in a base layer:
- Merino wool or a high-quality synthetic polyester blend.
- A snug but not restrictive fit so it can wick efficiently.
- Odor resistance for multi-day hunts.
- Lightweight options for early season and midweight options for colder hunts.
Avoid cotton entirely. It absorbs moisture, takes forever to dry, and becomes dangerous in cold, wet conditions.
Layer 2: Mid Layer Temperature Control
The mid layer is where your mountain hunt layering system lives or dies. This is your primary insulation during moderate activity and your warmth anchor during cold glassing sessions. It needs to breathe when you are working hard and retain heat when you stop.
What to look for in a mid layer:
- Stretch and breathability for active movement.
- Enough insulation to keep you warm when stationary in cold temperatures.
- Packability so it can fit into a pack pocket or hip belt pouch.
- A half-zip for fast ventilation on the move.
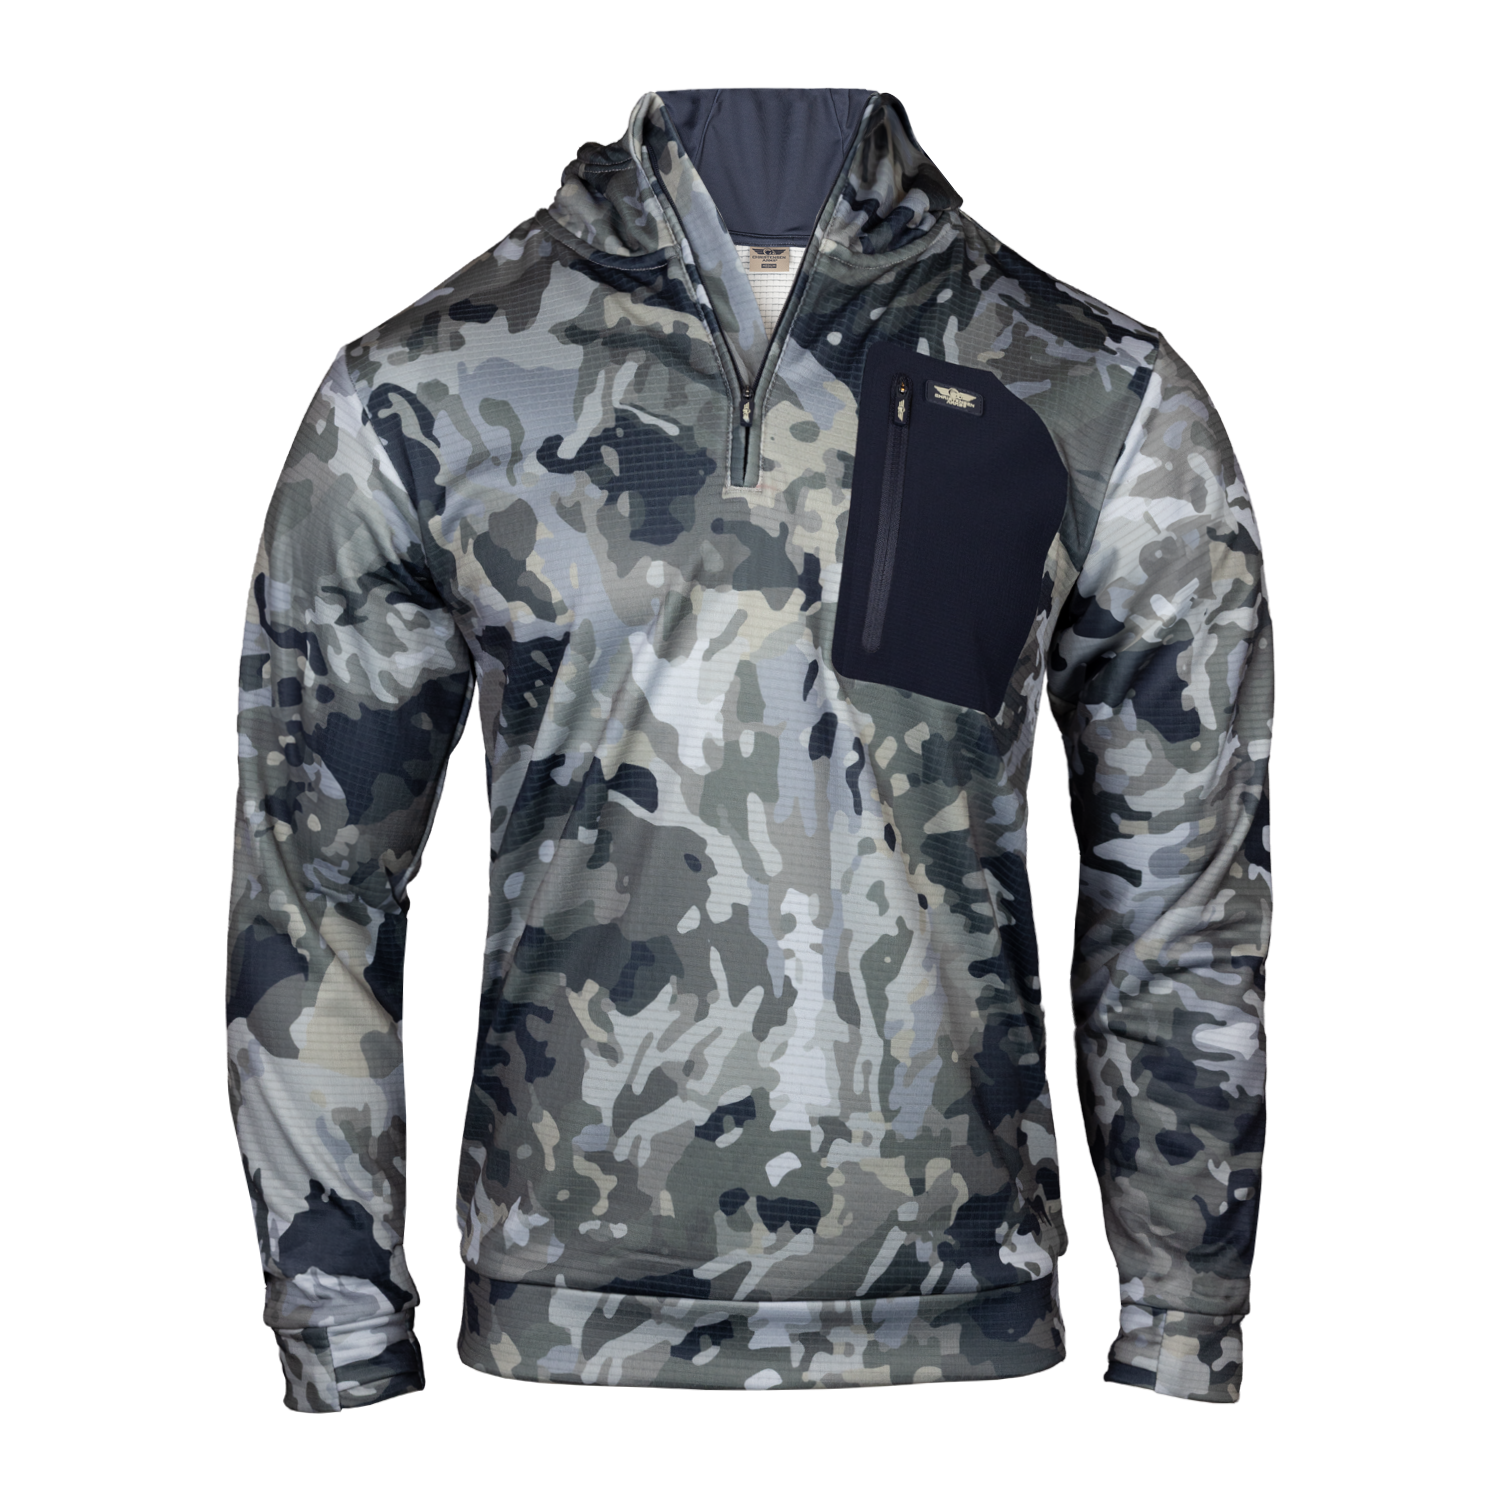
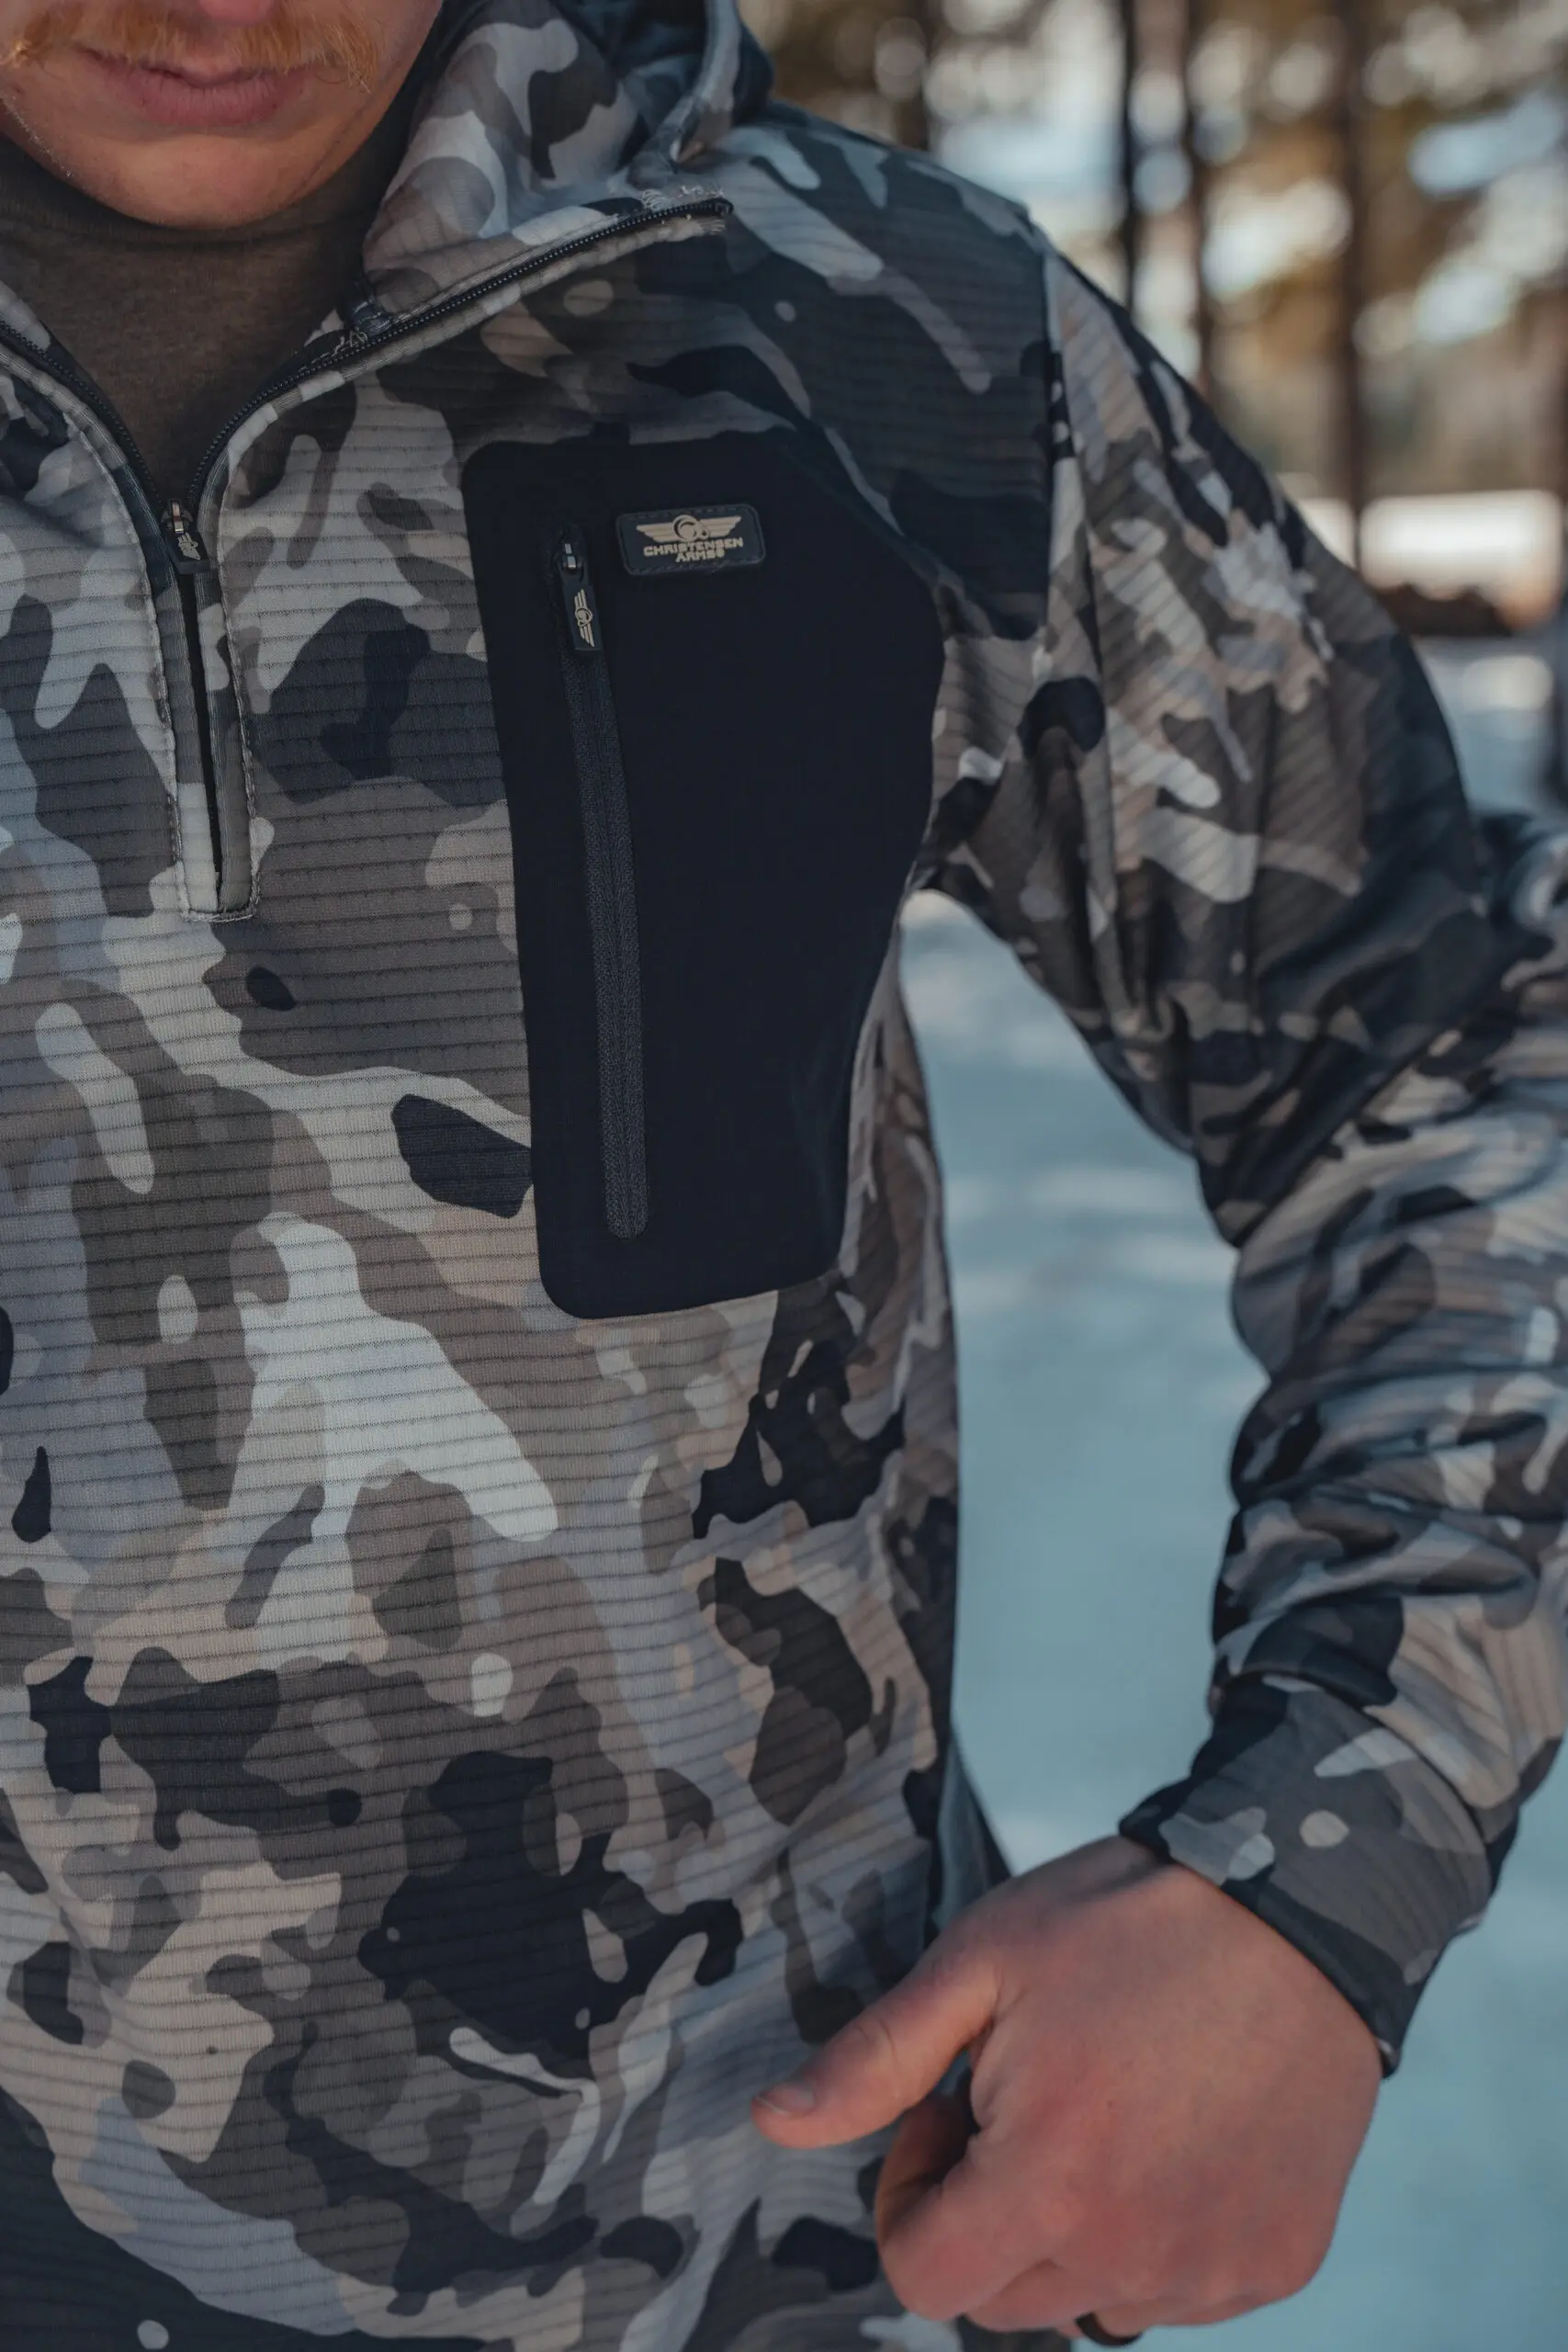
Performance 1/2 Zip Pullover
Built from Performance Poly-Grid fabric, the Christensen Arms Performance 1/2 Zip Pullover delivers the stretch and breathability active hunters need on the move, while the brushed thermal interior adds warmth when the pace slows.
Thumb-slit hand openings keep sleeves locked in place under a shell, and the welded chest pocket keeps a rangefinder, phone, or calls close without digging through layers.
Shop the Pullover
Layer 3: Outer Layer Wind and Weather Protection
Your outer layer is your shield. It does not need to be your primary insulation, but it does need to stop wind, manage precipitation, and breathe well enough that you do not overheat underneath it.
Softshell
A softshell is best for dry, high-activity conditions. Softshells are more breathable than hardshells and allow more freedom of movement. They are also quieter in brush, which matters when you are inside 200 yards of elk.
Hardshell / Waterproof-Breathable
When precipitation is in the forecast or you are hunting above treeline where weather rolls in fast, a hardshell is non-negotiable. Look for a waterproof-breathable membrane, taped seams, and a hood that protects without blocking visibility.
Many mountain hunters carry both: a softshell for active climbing and a hardshell in the pack as a weather emergency.
How a Mountain Hunt Layering System Works in the Field
A dialed system changes throughout the day. The pieces matter, but the transitions matter just as much.
- Pre-dawn: Cold and stationary. Mid layer on, outer layer on.
- The climb: Body temperature rises. Outer layer goes into the pack early. Mid layer gets vented or stowed once you are generating heat.
- The glassing knob: You stop moving and cool down fast. Mid layer goes back on. If there is wind, the outer layer follows.
- The stalk: Close to the animal, moving slowly, and trying to avoid noise or bulk. Mid layer only is often the right answer.
- Post-harvest camp: Stack your layers, add a puffy if you have one, and get camp established before the cold settles in.
Common Mountain Hunt Layering Mistakes
- Overdressing at the trailhead: Start cold or you will be soaked before you hit elevation.
- Skipping the mid layer to save pack weight: The mid layer is weight you rarely regret.
- Using a down puffy as your only insulation: Down is a backup layer, not a primary weather shield.
- Burying layers at the bottom of your pack: Your layering system only works if you can reach it quickly.
- Wearing your mid layer during a long, hard climb: You will overheat and soak it through.
Build a Layering System You Know Cold
The best mountain hunt layering system is not always the most expensive one. It is the one you have tested, dialed in, and know how to run without thinking.
Take your system on conditioning hikes before the season opens. Learn when you heat up, when you cool down, and which pieces you reach for most. When you are glassing a bull at last light and the temperature is dropping hard, your kit should already be second nature.
Your rifle is dialed. Your pack is built. Make sure your layering system is ready to perform too.
Gear Up for What's Next
The Christensen Arms Performance 1/2 Zip Pullover is built for hunters who move hard, stop fast, and need a mid layer that keeps pace.
Warm. Breathable. Built for the backcountry. Shop the Pullover